


Comb, Don’t Claw: How to Hold Your Parting Comb for Cleaner Lines
A clean part can change the entire look of a braided style before the first braid even begins. When the lines are sharp, the base looks intentional, the rows feel organized, and the finished style has a more professional finish from every angle. But clean parting is not only about having a good comb. It is about how the comb is held, how much pressure is used, how the hair is prepared, and whether the braider is guiding the line or scratching through the scalp. The parting comb should work like a precision tool, not like a claw. If the hand is too aggressive, the part may look broken, the client may feel discomfort, and the surrounding hair can fall back into the section before the braid even starts.
Control Pressure, Angle, and Preparation
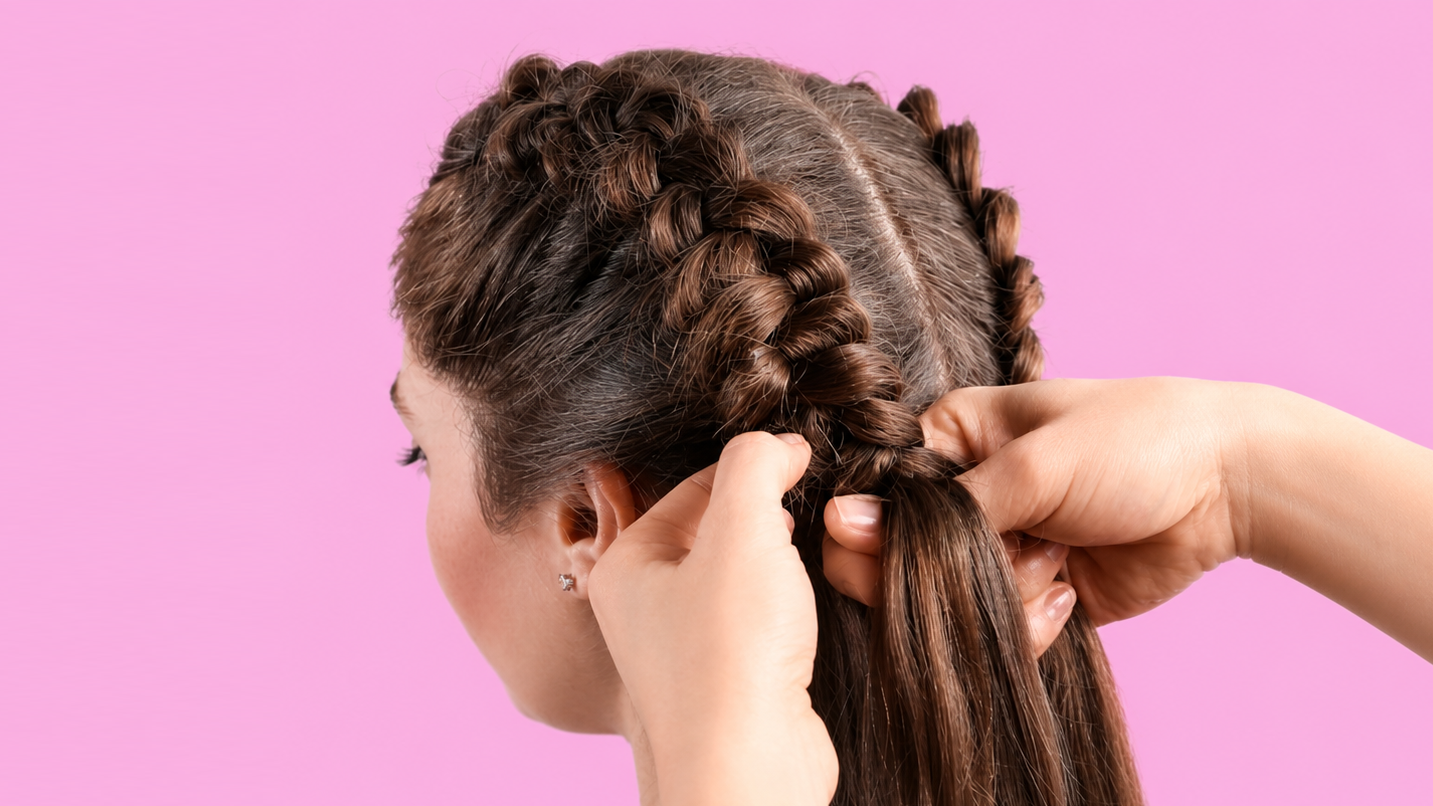
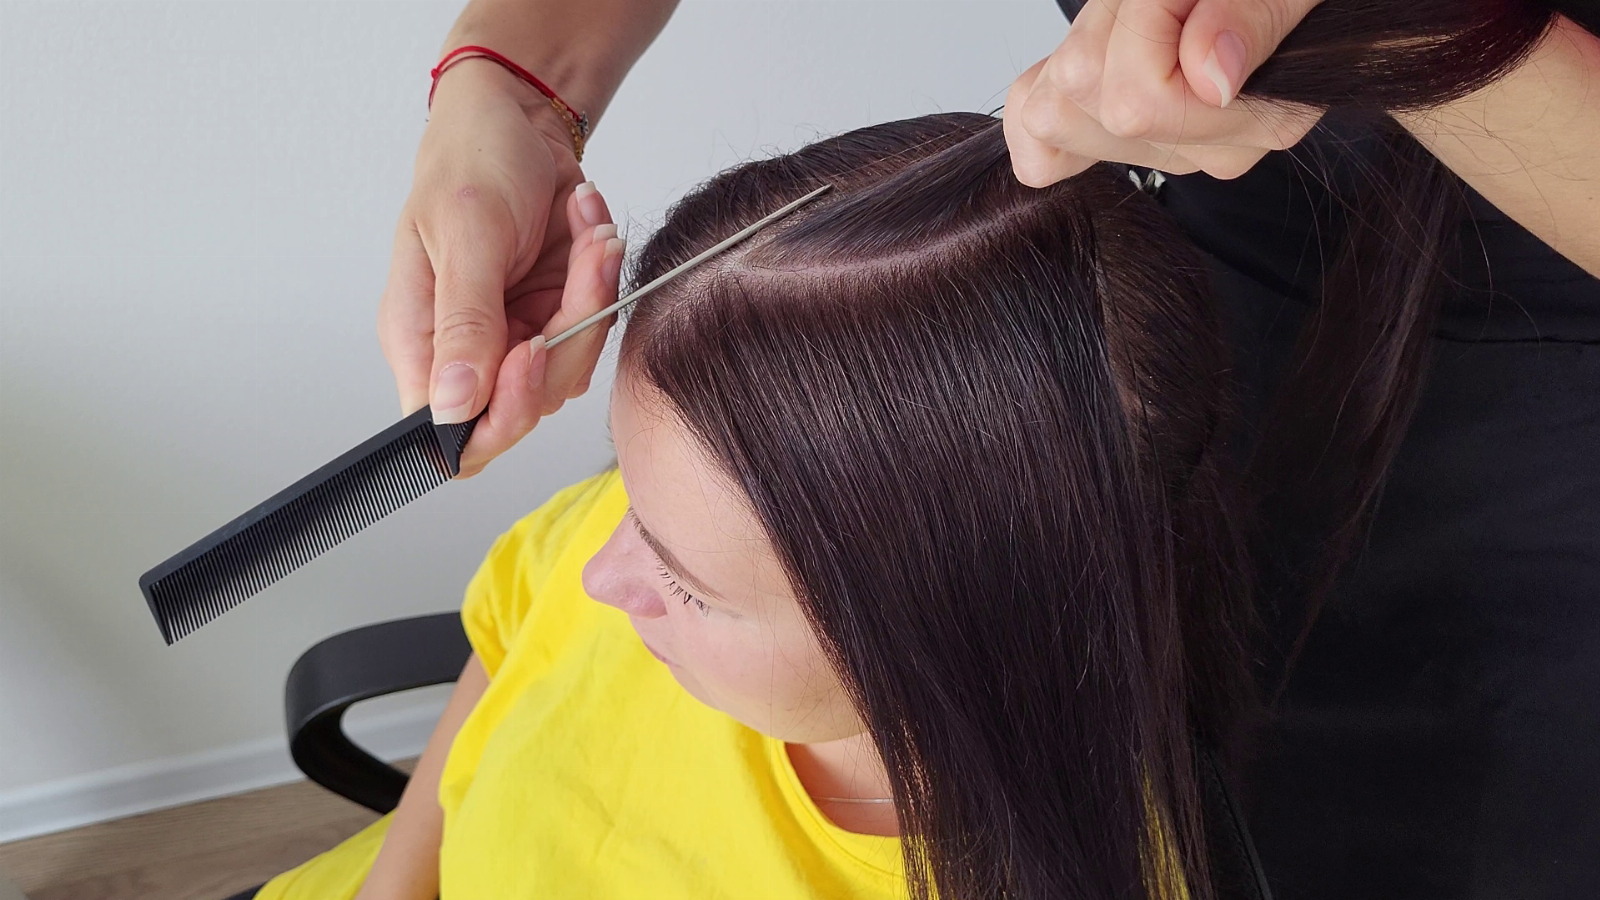
The biggest mistake many beginners make is pressing the tail of the comb too hard into the scalp. It can feel like stronger pressure will create a cleaner line, but in practice it often creates the opposite result. When the comb digs into the scalp, the hand becomes tense, and the line can turn shaky. The client may flinch, the hair can separate unevenly, and the part may need to be corrected several times. A cleaner method is to hold the comb with control and let the tail glide through the hair with enough pressure to separate, but not enough pressure to scratch. Clean parting should feel precise, not painful.
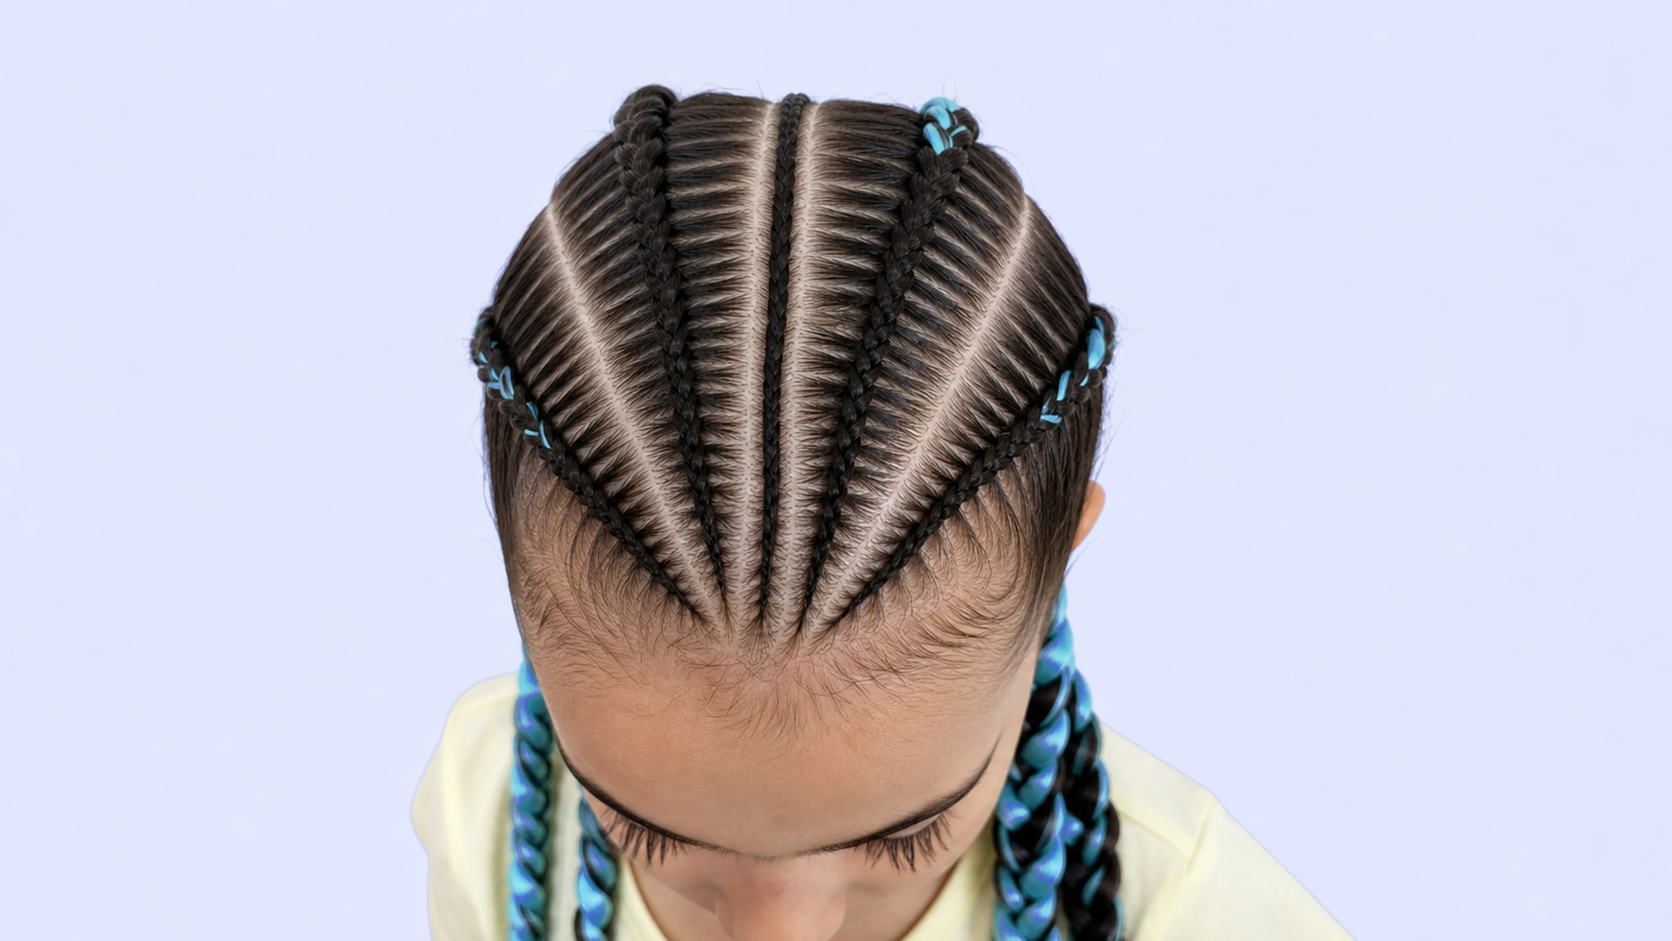
The angle of the comb matters as much as the pressure. If the tail of the comb is held too upright, it can poke into the scalp and create a harsh, uneven path. If it is held too flat, it may skim over the hair without separating the section clearly. A professional parting angle sits between those two extremes. The tail should be close enough to the scalp to define the line, but the movement should come from the hand guiding the comb, not from forcing the point down. This is especially important in Cornrows, Box Braids, Knotless Braids, Feed-In Braids, and any braided style where the scalp pattern is visible.
Before creating the part, the hair has to be prepared. A parting comb cannot cut a clean line through tangled, crossed, or dry hair without creating extra friction. The working area should be detangled and smoothed in the direction it will be sectioned. If the hair is dense, curly, or textured, it helps to work in smaller zones instead of trying to draw one perfect line through a large uncontrolled area. A light amount of product or water can help control flyaways, but the hair should not be so wet or overloaded with gel that it becomes slippery or heavy. The goal is controlled hair, not coated hair.
Create the Line with Intention
Another parting issue comes from hesitation. When the braider starts a line, stops, changes direction, then cuts the same area again, the part can become fuzzy. The cleanest parts usually come from making a clear decision before the comb touches the hair. The braider should know where the line begins, where it ends, and what shape the section needs to support. This does not mean every part has to be rushed. It means the hand should move with purpose. A confident, steady line usually looks cleaner than a line that has been corrected five times.
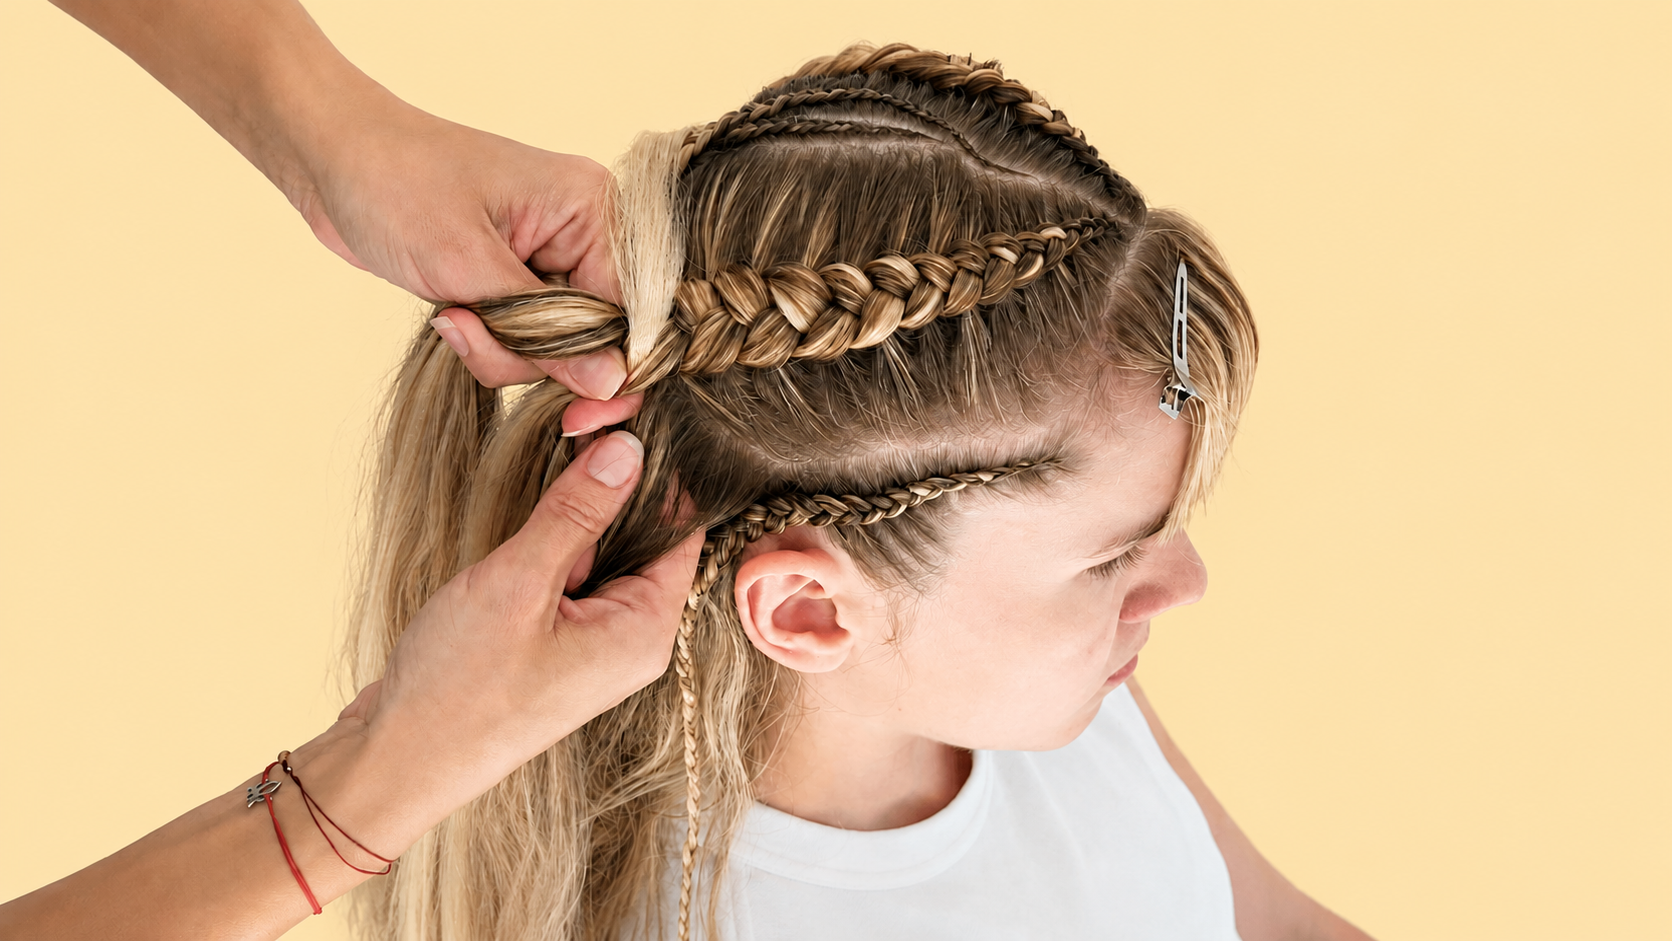
Once the part is created, it has to be protected. Many braiders make a clean line, then lose it because the surrounding hair falls back into the section. This is where clips matter. After separating the hair, secure each side immediately so the part stays visible and clean. If the section is for Box Braids or Knotless Braids, the base should be checked before adding hair. If the section is for Cornrows or Feed-In Braids, the direction of the braid should match the direction of the part. A clean part is not finished until the hair around it is controlled.
The hand holding the comb should stay relaxed. A tight hand often creates a tight line in the wrong way: too much pressure, too many small corrections, and too much tension in the wrist. A relaxed hand gives the braider better sensitivity. It becomes easier to feel when the comb is moving through the hair smoothly and when it is catching on tangles or product buildup. This sensitivity is important because different hair textures respond differently. Fine straight hair may separate quickly but slip back into place. Dense curly hair may need more preparation and smaller sections. Coily hair may require slower movement and cleaner clipping to keep the part defined.
Practice Cleaner Parting as a Full System
For practice, it helps to create the same part several times on a mannequin head or model without braiding right away. Draw a center part, then a side part, then a curved part, then a row for a braid base. After each part, step back and check the line from above. Is it straight where it should be straight? Is it smooth where it should curve? Is one side heavier than the other? This kind of practice trains the eye. Many braiders focus only on the braid itself, but the part is what gives the braid its frame. If the frame is weak, the braid has to work harder to look clean.
Parting also affects comfort and safety. A poorly planned section can pull hair from the wrong direction or overload a small base. A rough combing technique can irritate the scalp before the braid begins. A professional braider needs to think about the client’s experience during sectioning, not only during installation. If the client is wincing while the part is being made, the technique needs to soften. Clean work should never depend on scratching, dragging, or forcing the hair into place. Precision and comfort should work together.
Product should be used carefully around parting. A small amount of braiding gel or edge control can sharpen the line and help short hairs stay in place, but too much product can make the part look greasy, stiff, or cloudy. It can also build up near the scalp and create white residue later. The best approach is to apply product only where the hair needs control, then comb it through before finalizing the section. If product is sitting visibly on top of the hair, it is probably too much. Clean parting should still look like hair, not like product holding the whole section together.
The phrase “comb, don’t claw” is a useful reminder because it changes the braider’s mindset. The comb is not there to attack the scalp or force the hair apart. It is there to map the style. A parting comb should create direction, balance, and clean separation. When the hand is calm, the pressure is controlled, and the surrounding hair is clipped away properly, the line looks sharper, and the client feels more comfortable. That is the professional standard.
Cleaner lines come from a full system: detangle first, choose the section shape, hold the comb at the right angle, use gentle pressure, create the line with intention, and clip the hair immediately. When these steps become a habit, the braids look cleaner before the actual braiding even starts. The finished style becomes easier to install, easier to photograph, and easier to wear. A clean part is not a small detail. It is one of the clearest signs that the braider understands structure, control, and professional finishing from the very beginning of the service.